
When it comes to learning new technology such as deep learning, configuring your development environment tends to be half the battle. Different operating systems, hardware, dependencies, and the actual libraries themselves can lead to many headaches before you’re even able to get started studying deep learning.
These issues are further compounded by the speed of deep learning library updates and releases — new features push innovation, but oftentimes break previous versions. Your environment can quickly become obsolete, so it is imperative to become an expert in installing and configuring your deep learning environment.
I’ll be demonstrating how to configure your own native development environment for the following operating systems and peripherals:
- Configuring Ubuntu for deep learning with Python (i.e., the post you are currently reading)
- Setting up Ubuntu (with GPU support) for deep learning with Python
- Configuring macOS for deep learning with Python
To get started configuring your Ubuntu machine for deep learning with Python, just keep reading.
Configuring Ubuntu for deep learning with Python
Today, our blog post is broken down into four relatively easy steps:
- Step #1: Install Ubuntu system dependencies
- Step #2: Create your Python 3 virtual environment
- Step #3: Compile and Install OpenCV
- Step #4: Install Keras
Taking note of the steps, you will see that Deep Learning for Computer Vision with Pythonsupports Python 3.
Notice that we have chosen Keras as our deep learning library. Keras “stands out from the rest” of the available libraries for it’s ease of use and compatibility with both Tensorflow and Theano.
To get started, you’ll want to have some time on your hands and access to an Ubuntu machine’s terminal — SSH is perfectly suitable if your box is in the cloud or elsewhere. Let’s begin!
Step #1: Install Ubuntu system dependencies
The purpose of this step is to prepare your system with the dependencies necessary for OpenCV.
All steps in this tutorial will be accomplished by using your terminal. To start, open up your command line and update the apt-get package manager to refresh and upgrade and pre-installed packages/libraries:
1
2
|
$ sudo apt-get update
$ sudo apt-get upgrade
|
We’ll also need to install some developer tools as well as prerequisites required for image and video I/O, optimizations, and creating plots/visualizations:
1
2
3
4
5
6
7
8
|
$ sudo apt-get install build-essential cmake git unzip pkg-config
$ sudo apt-get install libjpeg-dev libtiff5-dev libjasper-dev libpng12-dev
$ sudo apt-get install libavcodec-dev libavformat-dev libswscale-dev libv4l-dev
$ sudo apt-get install libxvidcore-dev libx264-dev
$ sudo apt-get install libgtk-3-dev
$ sudo apt-get install libhdf5-serial-dev graphviz
$ sudo apt-get install libopenblas-dev libatlas-base-dev gfortran
$ sudo apt-get install python-tk python3-tk python-imaging-tk
|
We’ll wrap up Step #1 by installing the Python development headers and libraries for both Python 2.7 and Python 3.5 (that way you have both).
1
|
$ sudo apt-get install python2.7-dev python3-dev
|
Note: If you do not install the Python development headers and static library, you’ll run into issues during Step #3 where we run cmake to configure our build. If these headers are not installed, then the cmake command will be unable to automatically determine the proper values of the Python interpreter and Python libraries. In short, the output of this section will look “empty” and you will not be able to build the Python bindings. When you get to Step #3, take the time to compare your output of the command to mine.
Let’s continue on by creating a virtual environment to house OpenCV and Keras.
Step #2: Create your Python virtual environment
In this section we will setup a Python virtual environment on your system.
Installing pip
We are now ready to start configuring our Python development environment for the build. The first step is to install pip , a Python package manager:
1
2
3
|
$ wget https://bootstrap.pypa.io/get-pip.py
$ sudo python get-pip.py
$ sudo python3 get-pip.py
|
Installing virtualenv and virtualenvwrapper
I’ve mentioned this in every single install tutorial I’ve ever done, but I’ll say it again here today: I’m a huge fan of both virtualenv and virtualenvwrapper. These Python packages allow you to create separate, independent Python environments for eachproject that you are working on.
In short, using these packages allows you to solve the “Project X depends on version 1.x, but Project Y needs 4.x dilemma. A fantastic side effect of using Python virtual environments is that you can keep your system Python neat, tidy, and free from clutter.
While you can certainly install OpenCV with Python bindings without Python virtual environments, I highly recommend you use them as Python virtual environments. I’ll also be assuming that you have both virtualenv and virtualenvwrapper installed throughout the remainder of this guide.
Again, let me reiterate that it’s standard practice in the Python community to be leveraging virtual environments of some sort, so I suggest you do the same:
1
2
|
$ sudo pip install virtualenv virtualenvwrapper
$ sudo rm -rf ~/.cache/pip get-pip.py
|
Once we have virtualenv and virtualenvwrapper installed, we need to update our~/.bashrc file to include the following lines at the bottom of the file:
1
2
3
4
|
# virtualenv and virtualenvwrapper
export WORKON_HOME=$HOME/.virtualenvs
export VIRTUALENVWRAPPER_PYTHON=/usr/bin/python3
source /usr/local/bin/virtualenvwrapper.sh
|
The ~/.bashrc file is simply a shell script that Bash runs whenever you launch a new terminal. You normally use this file to set various configurations. In this case, we are setting an environment variable called WORKON_HOME to point to the directory where our Python virtual environments live. We then load any necessary configurations from virtualenvwrapper .
To update your ~/.bashrc file simply use a standard text editor. I would recommend using nano , vim , or emacs . You can also use graphical editors as well, but if you’re just getting started, nano is likely the easiest to operate.
A more simple solution is to use the cat command and avoid editors entirely:
1
2
3
4
|
$ echo -e "\n# virtualenv and virtualenvwrapper" >> ~/.bashrc
$ echo "export WORKON_HOME=$HOME/.virtualenvs" >> ~/.bashrc
$ echo "export VIRTUALENVWRAPPER_PYTHON=/usr/bin/python3" >> ~/.bashrc
$ echo "source /usr/local/bin/virtualenvwrapper.sh" >> ~/.bashrc
|
After editing our ~/.bashrc file, we need to reload the changes:
1
|
$ source ~/.bashrc
|
Note: Calling source on ~/.bashrc only has to be done once for our current shell session. Anytime we open up a new terminal, the contents of ~/.bashrc will be automatically executed (including our updates).
Creating a virtual environment for deep learning and computer vision
Now that we have installed virtualenv and virtualenvwrapper, the next step is to actually create the Python virtual environment — we do this using the mkvirtualenv command.
In past install tutorials, I’ve presented the choice of Python 2.7 or Python 3. At this point in the Python 3 development cycle, I consider it stable and the right choice. You may elect to use Python 2.7 if you have specific compatibility requirements, but for the purposes of my new deep learning book we will use Python 3.
With that said, for the following command, ensure your Python ( -p ) flag is set to python3 :
1
|
$ mkvirtualenv dl4cv -p python3
|
Regardless of which Python version you decide to use, the end result is that we have created a Python virtual environment named dl4cv (short for “deep learning for computer vision”).
You can name this virtual environment whatever you like (and create as many Python virtual environments as you want), but for the time being, I would suggest sticking with the dl4cv name as that is what I’ll be using throughout the rest of this tutorial as well as the remaining install guides in this series.
Verifying that you are in the “dl4cv” virtual environment
If you ever reboot your Ubuntu system; log out and log back in; or open up a new terminal, you’ll need to use the workon command to re-access your dl4cv virtual environment. An example of the workon command follows:
1
|
$ workon dl4cv
|
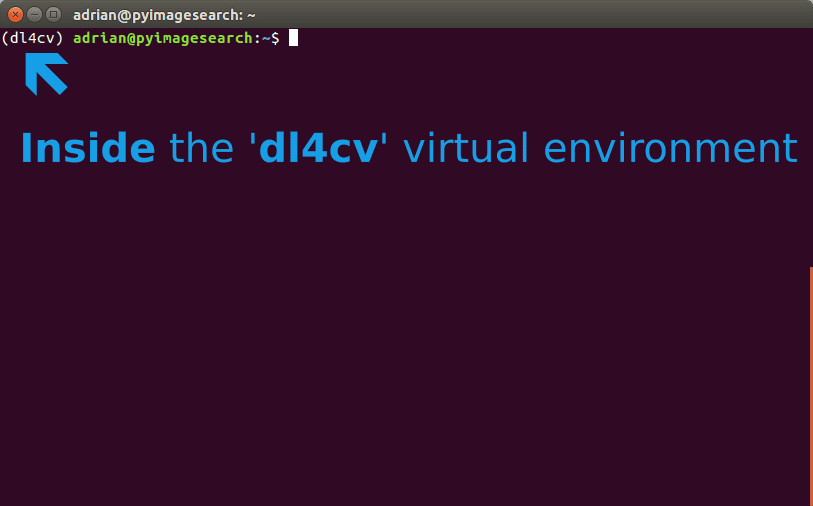
To validate that you are in the dl4cv virtual environment, simply examine your command line — if you see the text (dl4cv) preceding your prompt, then you are in the dl4cv virtual environment:
:
Figure 1: Inside the dl4cv virtual environment denoted by ‘(dl4cv)’ in the prompt.
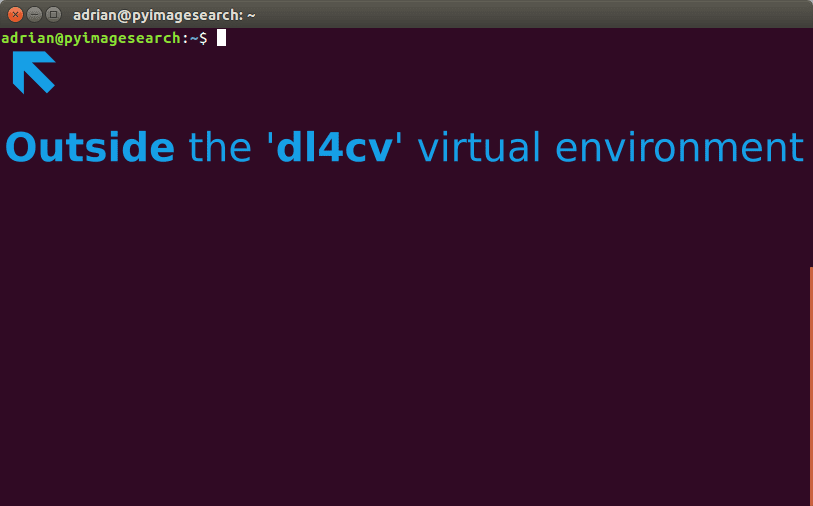
Otherwise if you do not see the dl4cv text, then you are not in the dl4cv virtual environment:
Figure 2: Outside of the dl4cv virtual environment. Simply execute the ‘workon dl4cv’ command to get into the environment.
Installing NumPy
The final step before we compile OpenCV is to install NumPy, a Python package used for numerical processing. To install NumPy, ensure you are in the dl4cv virtual environment (otherwise NumPy will be installed into the system version of Python rather than the dl4cv environment).
From there execute the following command:
1
|
$ pip install numpy
|
Step #3: Compile and Install OpenCV
In this section we will install and compile OpenCV. We’ll start by downloading and unarchiving OpenCV 3.3. Then we will build and compile OpenCV from source. Finally we will test that OpenCV has been installed.
Downloading OpenCV
First let’s download opencv and opencv_contrib into your home directory:
1
2
3
|
$ cd ~
$ wget -O opencv.zip https://github.com/Itseez/opencv/archive/3.3.0.zip
$ wget -O opencv_contrib.zip https://github.com/Itseez/opencv_contrib/archive/3.3.0.zip
|
You may need to expand the commands above to copy and past the full path to theopencv_contrib file.
Then, let’s unzip both files:
1
2
|
$ unzip opencv.zip
$ unzip opencv_contrib.zip
|
Running CMake
Let’s create a build directory and run CMake:
1
2
3
4
5
6
7
8
9
|
$ cd ~/opencv-3.3.0/
$ mkdir build
$ cd build
$ cmake -D CMAKE_BUILD_TYPE=RELEASE \
-D CMAKE_INSTALL_PREFIX=/usr/local \
-D WITH_CUDA=OFF \
-D INSTALL_PYTHON_EXAMPLES=ON \
-D OPENCV_EXTRA_MODULES_PATH=~/opencv_contrib-3.3.0/modules \
-D BUILD_EXAMPLES=ON ..
|
For CMake, it is important that your flags match mine for compatibility. Also, make sure that your opencv_contrib version is the exact same as the OpenCV version you downloaded (in this case version 3.3.0 ).
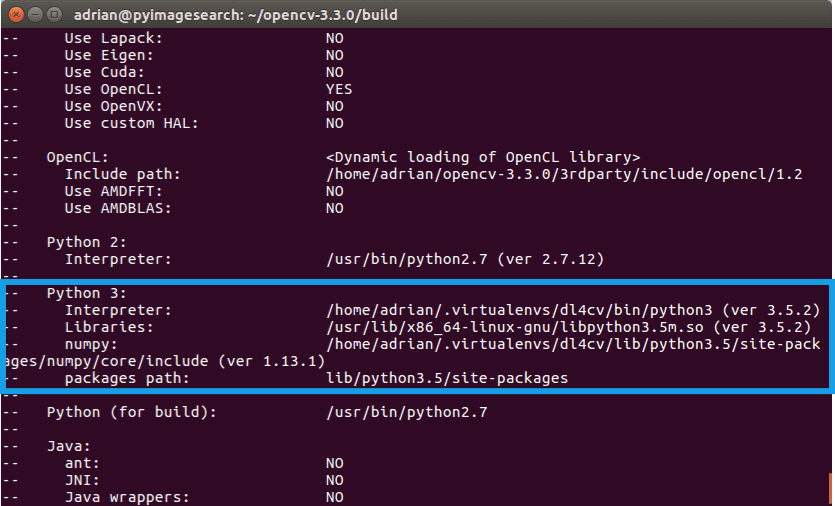
Before we move on to the actual compilation step make sure you examine the output of CMake!
Start by scrolling to the section titled Python 3 .
Make sure that your Python 3 section looks like the figure below:
Figure 3: Checking that Python 3 will be used when compiling OpenCV 3 for Ubuntu.
Pay attention that the Interpreter points to our python3.5 binary located in the dl4cv virtual environment while numpy points to our NumPy install.
In either case if you do not see the dl4cv virtual environment in these variables’ paths, then it’s almost certainly because you are NOT in the dl4cv virtual environment prior to running CMake!
If this is the case, access the dl4cv virtual environment using workon dl4cv and re-run the command outlined above (I would also suggest deleting the build directory and re-creating it).
Compiling OpenCV
Now we are now ready to compile OpenCV with 4 cores:
1
|
$ make -j4
|
Note: You can try a version of the -j4 flag corresponding to the number of cores of your CPU to achieve compile time speedups. In this case I used -j4 since my machine has four cores. If you run into compilation errors, you may run the command make clean and then just compile without the parallel flag: make .
From there, all you need to do is to install OpenCV 3.3 and then free up some disk space if you so desire:
1
2
3
4
5
|
$ sudo make install
$ sudo ldconfig
$ cd ~
$ rm -rf opencv-3.3.0 opencv.zip
$ rm -rf opencv_contrib-3.3.0 opencv_contrib.zip
|
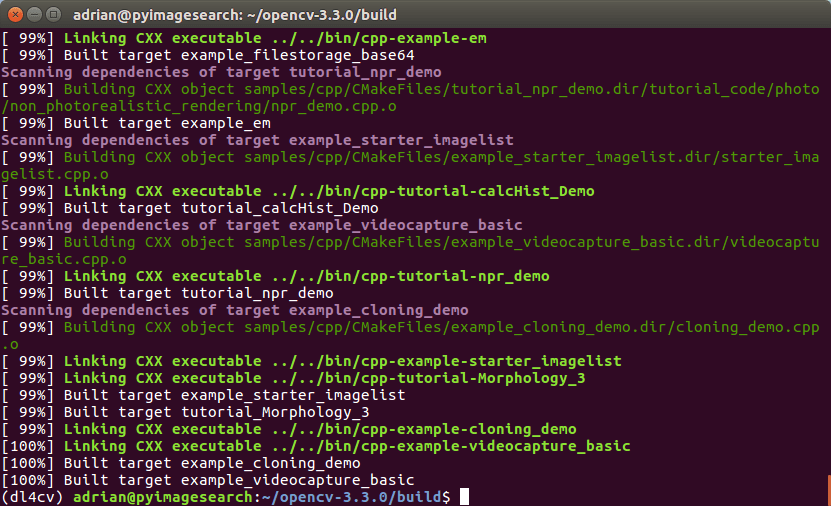
When your compilation is complete you should see output that looks similar to the following:
Figure 4: OpenCV compilation is complete.
Symbolic linking OpenCV to your virtual environment
To sym-link our OpenCV bindings into the dl4cv virtual environment, issue the following commands:
1
2
3
|
$ cd ~/.virtualenvs/dl4cv/lib/python3.5/site-packages/
$ ln -s /usr/local/lib/python3.5/site-packages/cv2.cpython-35m-x86_64-linux-gnu.so cv2.so
$ cd ~
|
Notice that I am using Python 3.5 in this example. If you are using Python 3.6 (or newer) you’ll want to update the paths to use your version of Python.
Secondly, your .so file (i.e., the actual OpenCV bindings) may be some variant of what is shown above, so be sure to use the appropriate file by double-checking the path.
Testing your OpenCV 3.3 install
Now that we’ve got OpenCV 3.3 installed and linked, let’s do a quick sanity test to see if things work:
1
2
3
4
|
$ python
>>> import cv2
>>> cv2.__version__
'3.3.0'
|
Make sure you are in the dl4cv virtual environment before firing up Python ( workondl4cv ). When you print out the version, it should match the version of OpenCV that you installed (in our case, OpenCV 3.3.0 ).
That’s it — assuming you didn’t encounter an import error, you’re ready to go on to Step #4where we will install Keras.
Step #4: Install Keras
For this step, be sure that you are in the dl4cv environment by issuing the workon dl4cv command. Then install our various Python computer vision, image processing, and machine learning libraries:
1
2
3
|
$ pip install scipy matplotlib pillow
$ pip install imutils h5py requests progressbar2
$ pip install scikit-learn scikit-image
|
Next, install Tensorflow:
1
|
$ pip install tensorflow
|
Notice how we are using the CPU version of TensorFlow. I will be covering the GPU versionin a separate tutorial.
Installing Keras is extremely simple, thanks to pip :
1
|
$ pip install keras
|
Again, do this in the dl4cv virtual environment.
You can test our Keras install from a Python shell:
1
2
3
4
|
$ python
>>> import keras
Using TensorFlow backend.
>>>
|
You should see that Keras has been imported with no errors and the TensorFlow backend is being used.
Before you wrap up the install tutorial take a second to familiarize yourself with the~/.keras/keras.json file:
1
2
3
4
5
6
|
{
"image_data_format": "channels_last",
"backend": "tensorflow",
"epsilon": 1e-07,
"floatx": "float32"
}
|
Ensure that image_data_format is set to channels_last and backend is tensorflow .
Congratulations! You are now ready to begin your Deep learning for Computer Vision with Python journey.